Building Awesome CRM – Part 1
If you are an organization with a product portfolio for other businesses, your sales team must be interacting with prospective customers. These interactions might stretch over weeks, months, and at times even years. It becomes therefore important for the organization to have CRM (Customer Relationship Management) systems that empower sales team to stay on top of their client interactions and have visibility so that they can prioritize accordingly. At the same time, it becomes imperative for the management to have a view of what’s happening, have an ability to forecast accurately, and detect patterns in the sales pipelines.
For startups, investing in expensive off-the-shelf CRM solutions is usually not an easy choice to make. Even if there are solutions that meet the price ask, startups typically require need high degree of customization, which is difficult to achieve with a 3rd party solution. If this sounds familiar, you can follow this section for building an awesome CRM that’s 100% customizable (you got the source code!), can be easily integrated with other applications and extended to meet growing needs. I must, however, mention that it is no substitute to the mature CRM solutions such as SalesForce, by any stretch of imagination. My startup (ePayLater) used both the bespoke solution and the off-the-shelf solution (we did SalesForce), and the strategy served us well.
I have used Streamlit – which is almost like a discovery of the year for me :), to build the CRM functionalities. It’s a fantastic tool wherein you can use power of Python at the backend to build beautiful and interactive dashboards. In short, it’s magic.
For the starters, we will build placeholders for core modules. This would include modules for adding merchant (‘Add Merchant’), adding or updating opportunity (‘Add/Update Opportunity’), and reports (‘Scorecards’). In my implementation, I have included creating contacts within ‘Add Merchant’. You may want to keep it separate if that works better for you. I have built an Introduction section (‘Introduction’) which is the like the home page of the application. I had used this section to remind the team about company values, business goals, product videos, motivational quotes etc. Well, Streamlit allows you to embed media – video, images etc. so you can make this section as rich as you like. More on that later. Module ‘View Raw Data’ allows user to slice and dice the pipeline and self-assess performance, make a day plan etc. Lastly, ‘CRM Admin’ module is for carrying out system administration tasks such as deleting/modifying database tables etc. It was required in our case as few users were more comfortable using Google Sheets prior to transition and we wanted to ensure that the switch to be gradual for the users, and not requiring downtime of any sort.
Once the application is done, you can deploy it on AWS, Azure or any other PaaS platform. I found that Heroku makes it super easy to deploy Streamlit apps. While I will not get into the deployment part in my blog here, but let me tell you it’s very easy and shouldn’t take more than 45 mins even in the first go, and less than 10 thereafter. I promise to share a link to an excellent tutorial to help you with this.
def CRMLauncher()
option = st.sidebar.radio('CRM', ['Introduction', 'Scorecard','Add Merchant', 'Add/Update Opportunity', 'View Raw Data','CRM Admin'])
if option == 'Introduction':
st.title('Welcome to CRM')
st.subheader('To get started, select one of the options from the menu on bottom left')
elif option == 'Scorecard':
CRM_summary()
elif option == 'Add Merchant':
CreateMerchant()
elif option == 'Add/Update Opportunity':
SalesUpdate()
elif option == 'View Raw Data':
ViewRawData()
elif option == 'CRM Admin':
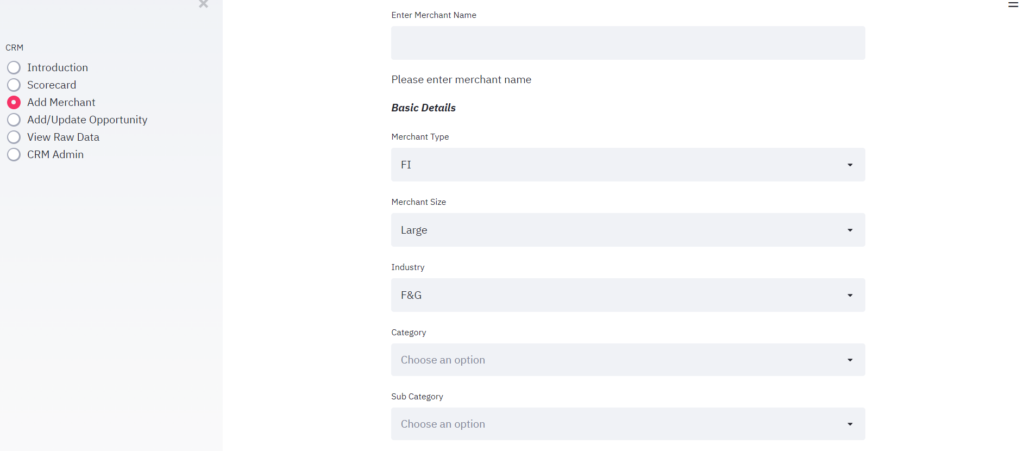
CRMAdmin()In above code, have just created the main navigation menu. You should be able to view it in the figure 1 above. If the user selects "Add Merchant", I call CreateMerchant() function below
def CreateMerchant():
    df = pd.read_csv('Validations.csv')
    M_types = df['Type'].dropna()
    M_sizes = df['Size'].dropna()
    M_industries = df['Industry'].dropna()
    M_categories = df['Category'].dropna()
    M_subcategories = df['Sub_Category'].dropna()
    M_lead_sources = df['Lead_Source'].dropna()

    M_name = st.text_input('Enter Merchant Name')
    if M_name:
        while True:
            if not DeDupeCheck(M_name):
                m_id = assignMID(M_name)
                break
    else:
        m_id = 0
        st.write("Please enter merchant name")

    st.markdown("_**Basic Details**_")
    M_type = st.selectbox("Merchant Type", M_types)
    M_size = st.selectbox("Merchant Size", M_sizes)
    M_industry = st.selectbox("Industry", M_industries)
    M_category = st.multiselect("Category", M_categories)
    M_sub_category = st.multiselect("Sub Category", M_subcategories)

    st.write("_**Lead Source**_")
    M_lead_source = st.selectbox("Lead Source", M_lead_sources)

    st.write("_**Additional Information**_")
    M_addinfo = st.text_input("Merchant details or any other additional information")

    M_record = [[m_id, M_name, M_type, M_size, M_industry, M_category, M_sub_category, M_lead_source, M_addinfo]]
    cols = ['Merchant ID', 'Merchant Name', 'Merchant Type', 'Size', 'Industry', 'Category', 'Sub Category', 'Lead source', 'Addl Info']
    df = pd.DataFrame(M_record, index = [m_id], columns = cols)
    for col in df.columns:
        df[col] = df[col].astype('str')

    st.markdown("_**Merchant Summary**_")
    st.table(df.T)
    if st.button("Add Merchant to DB"):
        if m_id > 0:
            UpdateMerchantDB(df)
        else:
            st.warning("Please enter the required fields")

    st.write("-----------------------------------------------------------------------------------------------")
    st.markdown("_**Contact Manager**_")
    if st.checkbox("Add Contact", value = True):
        AddContact(m_id)
Am presuming there would be certain specific industries or sub-industries your products would be catering to. Further, your business development team might be reaching out to different types of entities. For e.g in our business, we on-board online merchants and also financial institutions, both of which are enterprise/B2B sales. Depending upon you want to bucketize your target clients, you can create filters accordingly. I have also done so, and recorded the potential industries, sub-industries, type and size (one of the 3 – large, medium, small in our case) in a csv sheet called validations.csv. I have saved the sheet in the project folder and read from it as first step before creating a new merchant.
Since I wanted to assign a unique ID to each merchant, I have used 2 functions – DeDupeCheck() and assignMID(). Have created a Database MerchantDB.db for recording Merchant details as entered by the user. Have also created a bunch of other functions that will help us achieve the desired functionality of Add Merchant. These include:
* UpdateMerchantDB(): To add Merchant to the Database
* ReadMerchantDB(): To read Merchant details from the table. Will use it to create reports.
* AddContact_toDB(): Add contacts to Database
* ReadContactsDB(): Reading contacts
* getCustList(): For fetching customer list
def DeDupeCheck(M_name):
    return False
    M_list = getCustList()
    if M_name in M_list:
        return True
    else:
        return False

def assignMID(M_name):
    MID_list = getCustMIDs()
    MID_list = [int(x) for x in MID_list]
    while True:
        MID = random.randint(10000,99999) #number between these 2
        if MID in MID_list:
            continue
        break
    return(MID)

def UpdateMerchantDB(df_merchant):
    conn = sqlite3.connect('MerchantDB.db')
    c = conn.cursor()
    df_merchant.to_sql('MERCHANTS', conn, if_exists = 'append', index = False)
    st.success("Successfully updated Merchants table")
    conn.commit()
    conn.close()

def ReadMerchantDB():
    conn = sqlite3.connect('MerchantDB.db')
    st.write("Header records")
    df = pd.read_sql_query("""SELECT * from MERCHANTS""", conn)
    st.write(df.head())
    if st.checkbox("Show data types"):
        st.write(df.dtypes)
    query = ''
    if st.checkbox("Show entire merchant database"):
        query = "SELECT * from MERCHANTS"
    if st.checkbox("Write your own query"):
        query = st.text_area("Write your query")

    if query:
        try:
            df = pd.read_sql_query(query, conn)
            st.write(df)
        except Exception as e:
            st.warning("Problem with query. Please check")
    else:
        st.info("Please select an option from above")
    conn.close()

def AddContact(m_id):
    name = st.text_input("name", key = '1')
    designation = st.text_input("designation", key = '2')
    email = st.text_input("email", key = '3')
    phone = st.text_input("phone", key = '4')

    M_contact = [[m_id, name, designation, email, phone]]
    cols = ['Merchant ID','Name', 'Designation' ,'Email', 'Phone']
    df_contact = pd.DataFrame(M_contact, index = [m_id], columns = cols)

    if st.button('Add Contact to DB'):
        AddContact_toDB(df_contact)

def AddContact_toDB(df):
    conn = sqlite3.connect('MerchantDB.db')
    c = conn.cursor()
    df.to_sql('CONTACTS', conn, if_exists = 'append', index = False)
    st.success("Contact updated successfully!")
    conn.commit()
    conn.close()

def ReadContactsDB():
    conn = sqlite3.connect('MerchantDB.db')
    df = pd.read_sql_query("""SELECT * from CONTACTS""", conn)
    st.write(df)
    conn.close()

def getCustList():
    conn = sqlite3.connect('MerchantDB.db')
    df = pd.read_sql_query("""SELECT "Merchant Name" from MERCHANTS""", conn)
    conn.close()
return(df['Merchant Name'].tolist()) CY: Recognizing Faces
As a teenager, every time I would watch a Sci-Fi movie, one of the things that would really intrigue me was the way characters would gain access to the Secret Labs. It would be a sophisticated looking device at the entrance which would scan the face and in speak in its machine tone “Authenticated”. I wished having something as cool as that instead of a humble door bell 🙂
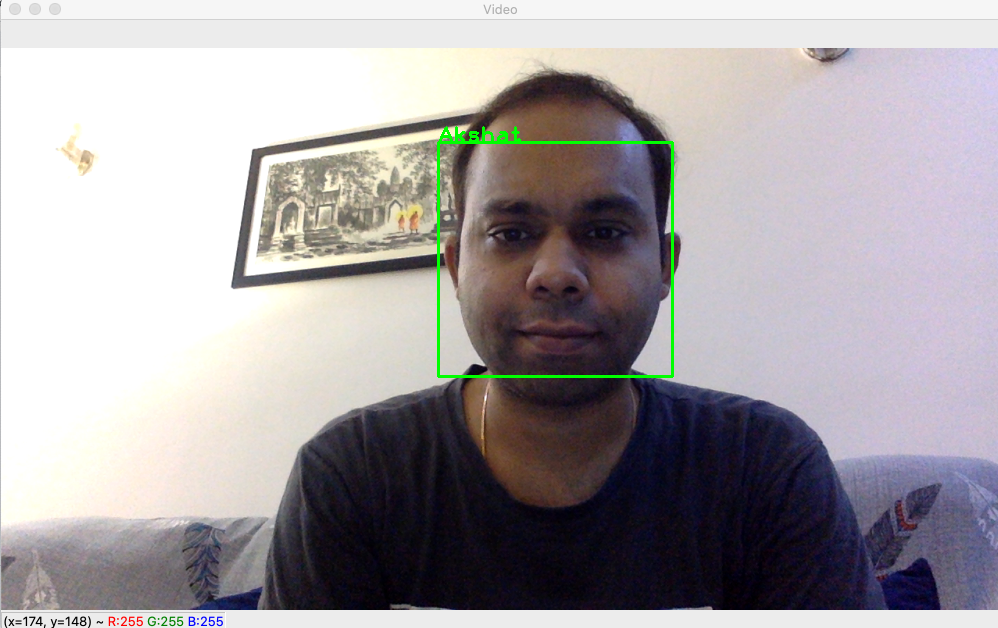
Well! The code below does that. In this, I will build a simple Face Recognition system that can take a live video feed or a static image as an input and mark the faces with their respective identifiers (I have used name e.g Akshat).
These are the steps we will follow to build this:
- Gathering a few solo images of the users. I have taken just about 50, but that’s only because I am lazy. You should pick at least 100 images. Don’t worry about cropping out just the face, the script here does that for you.
- We will use these images for training our models, one for each user. We will then save these models into files thus making them available for usage by any code.
- Will write a script that uses my laptop camera to take a live video feed and uses the models to determine if the user in front of the laptop is a known one or not.
Step 1: Gathering Images
So, after diving into my wife’s treasure cove of our vacation pics, I pulled out a few for solo ones (wasn’t easy to find Akshat-only pics 😐 but did manage to get a few for myself and a lot many for her). So, we move to the next step. I have created a folder on my local drive for storing these training images. I have named the folder “Faces” which isn’t the best name. You should rather have something more appropriate and serves as a mnemonic.
Within this folder, I have created sub-folders one for each user – 2 in my case. I have given them a format <subject_id>_<subject_name>. So, I got now 2 folders under “Faces” and these are “01_Akshat” and “02_Ankita”. Reason I do so is because down the line, I plan to automate the build-up of training set so that it keeps pace with my ageing self (sigh!).
I have then copied the images into respective folders and have used a format <subject_id>_<subject_name>_<image_id>. So, in “01_Akshat” folder, I have now – 01_Akshat_01.jpg, 01_Akshat_02.jpg up to 01_Akshat_50.jpg.

01_Akshat_01.jpg 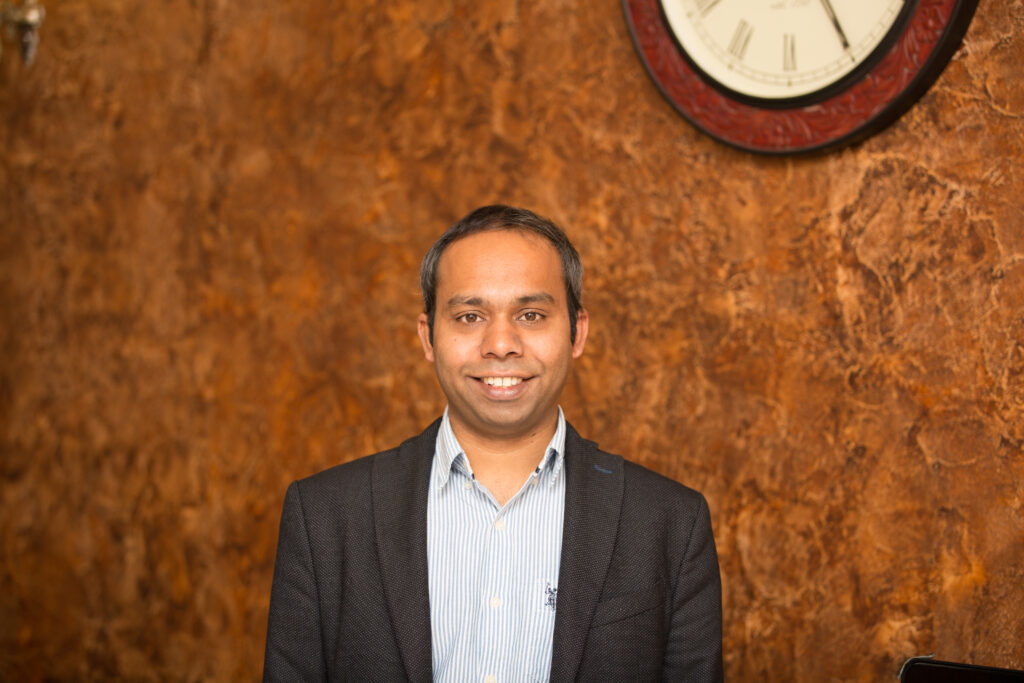
01_Akshat_02.jpg 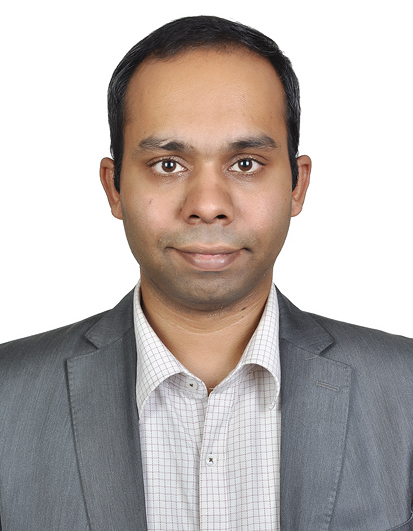
01_Akshat_03.jpg
As you might have noticed, images are of different resolutions but that’s not a problem either. I then prepare a set of images in other folder (02_Ankita) as well.
Step 2: Training Models
So, now we write a Python script which starts by importing the required libraries.
import cv2
import numpy as np
import os
import imutils
I use a MacBook which comes pre-loaded with Python 2. I have upgraded it to Python3. I am assuming that you have Python3 installed as well, and if not, you can look at one of the many web tutorials to understand the process. Once done, install the required libraries. I have used pip to get the required libraries. For most of the libraries, it’s just a 1 line command – pip3 install <library_name> except for openCV (cv2). I am skipping the installation part as well, however should you have any questions, you may put me a quick line and I would be happy to help. For installing openCV, I found this tutorial very helpful (this is for Mac).
We now create a function which takes folder path as input and returns following:
- Faces for training after they have been cropped out from the images. (One face per image, since the image were solo images)
- Label – this is essentially an identifier which tells the model that the image corresponds to the same user. For example, all the images of “subject = Akshat” at the time of training must take the same label. In my case, I have separated the label from the directory name and have used the same for training. That is, folder name “01_Akshat” tells my system that label = 1 belongs to “Akshat” and thus all the images in this folder must be tagged to the label = 1.
- Subject name along with subject id. This is same as Directory name itself except for the leading “0”. e.g 1_Akshat.
def get_TrainingImages_and_Labels(training_datadir):
    image_paths = [os.path.join(training_datadir,imgfile) for imgfile in os.listdir(training_datadir)]
    training_faces = []
    labels = []
    sub_id = int(os.path.split(training_datadir)[1].split("_")[0])
    sub_name = os.path.split(training_datadir)[1].split("_")[1]

    for image_path in image_paths:
        print(image_path)
        sub_image = cv2.imread(image_path,0)    #added 0 to read as Grayscale
        faces = faceCascade.detectMultiScale(sub_image)
        for (x,y,w,h) in faces:
            training_faces.append(sub_image[y:y+h, x:x+w])
            labels.append(sub_id)
    return(training_faces,labels, str(sub_id) + "_" + sub_name)

cascadePath='/Users/Akshat/PythonAkshat/Apps/Image/Face Detection/Final/haarcascade_frontalface_alt.xml'
faceCascade = cv2.CascadeClassifier(cascadePath)
In above code, we have passed folder path as input and iterated over the images in the folder and created a list of paths of all image files. We then create lists to store faces for training and corresponding labels, which would be extracted from each image file. Next we iterate over all the images to append faces and labels respectively. These lists are then returned for training. We also return subject_id + subject_name e.g “1_Akshat” as third parameter. You might be having a question – “what is happening in this line.
faces = faceCascade.detectMultiScale(sub_image)
Let me explain. But before that, look at these two lines of code first:
cascadePath='/Users/Akshat/PythonAkshat/Apps/Image/Face Detection/Final/haarcascade_frontalface_alt.xml'
faceCascade = cv2.CascadeClassifier(cascadePath)
OpenCV provides a set of Haar cascades and in this case, we have used haarcascade_frontalface_alt.xml for face detection. cv2.CascadeClassifier(cascadePath) is the method that loads the Haar cascade by taking its path as input.
What is Haar cascade? It is a machine learning approach where a classifier is created using a number of positive and negative images. A set of features (a property of a pattern that helps classify/measure) is created which together help identify a face. While potentially there could be a very high number of features that would classify an image as a face, a cascade function is used to optimize the computation by quickly eliminating the segment under investigation if it doesn’t meet the stage-wise criteria. For those who want to dig deeper, I have enclosed a few good links here: 1, 2. You could also write to me, and I will try my best to help.
Once we have loaded the Haar cascade, we use the object to locate faces in the given image. We do so here:
faces = faceCascade.detectMultiScale(sub_image)
If you couldn’t understand the above part, it’s just fine. Use the Haar cascades for your scripts, as you gather better understanding of them in parallel.
So, we now move to creating a Trained Set. Here’s the code:
TrainingSetPath = '/Users/Akshat/PythonAkshat/Apps/Image/Face Detection/Final/Faces'
for training_datadir in os.listdir(TrainingSetPath):
    if(os.path.isdir(TrainingSetPath + '/' + training_datadir)):
        training_faces,labels, subject = get_TrainingImages_and_Labels(TrainingSetPath + '/' + training_datadir)
        recognizer = cv2.face.LBPHFaceRecognizer_create()
        recognizer.train(training_faces,np.array(labels))
        recognizer.write('/Users/Akshat/PythonAkshat/Apps/Image/Face Detection/Final/TrainedSet/' + subject + '.yml')
Here, we are building our Trained Models by passing path of folders that carry Training Images. So, we iterate over contents of “Faces” folder which in my case have two sub-folders. I have used the flag os.path.isdir() to ensure that it picks only directories. In each iteration, it returns 2 lists – one each for faces and labels and subject identifier (e.g “1_Akshat”).
Next we create a Face Recognizer object. In this script, I have used LBPH though openCV provides 2 other recognizers. These are Eigen Face Recognizer (createEigenFaceRecognizer()) and Fisher Face Recognizer (createFisherFaceRecognizer()). If you want to learn more about LBPH, I recommend you look at this tutorial. Once we have created Recognizer object, we use .train() method to create a Trained model. To do so, we pass the lists we have fetched by calling the get_TrainingImages_and_Labels() function we had created. As the last step, we have saved the trained models in a Folder “TrainedSet” and give each model a name that allows other scripts to extract subject’s id and name. Models are saved in “.yml” format using .write() method of recognizer object.
Step 3: Recognizing Faces in live camera Feed
Before we start taking live camera feed, we will create a function that accepts an image, extracts faces from it and then matches each face with known users, using Trained Models we just created. It also returns a Flag (AKSHAT_AUTH) in case it is able to detect that one of the users in the input image is yours truly :). If so, it sets the Flag to True thus informing us that user Akshat has been successfully authenticated. We have now created a separate script. I have named it CY02.py (of course CY = CipherYogi 🙂 )
To begin with, we import the required libraries. I have imported pyttsx3 so that I can do a Text to Speech conversion and thus generate voice based confirmation of certain events, e.g successful authentication. You can of course, leave it out if you are are good without it.
import cv2
import os
import imutils
import numpy as np
import pyttsx3
import time
We create a Dictionary object TrainedSet with keys = subject_id_subject_name and value = Trained model. To do this, we iterate over the filed in the Folder “Trained Set” and look for files with “.yml” extension. We have also created a list “subjects” which has been initialized with null values preceded by “Unknown” (i.e 1st element or [0] index value). To read the Trained Model objects, we use .read() method of Face recognizer (earlier we had used .write() to create files).
def ReadTrainedSet():
    cascadePath =  '/Users/Akshat/PythonAkshat/Apps/Image/Face Detection/Final/haarcascade_frontalface_alt.xml'
    faceCascade = cv2.CascadeClassifier(cascadePath)
    print("Now reading trained set")
    TrainedSet = {}
    TrainedSetPath = '/Users/Akshat/PythonAkshat/Apps/Image/Face Detection/Final/TrainedSet'

    subjects = ["Unknown"] #subject[0] to refer to Unknown

    for traineddatafile in os.listdir(TrainedSetPath):
        subjects.append("")

    for traineddatafile in os.listdir(TrainedSetPath):
        if ".yml" in traineddatafile:
            name = os.path.split(traineddatafile)[1].split(".")[0]
            subjects[int(name.split("_")[0])] = name.split("_")[1] #e.g extracting name "Ankita" from "2_Ankita"
            path = TrainedSetPath + '/' + traineddatafile
            TrainedSet[name] = cv2.face.LBPHFaceRecognizer_create()
            TrainedSet[name].read(path)
    return(TrainedSet, subjects)
Having read the trained models and indexed them with their corresponding subject_id_subject_name as key in a Dictionary object, we now start the Face prediction part. To do so, we first extract the faces in the input image and then iterate over them, comparing with each Trained model in each iteration. Since the input images could be of any resolution, I have scaled them to a standard size using imutils.resize()function. Overall, the function works as follows:
- Take image as input, along with TrainedSet and subjects list. I have passed TrainedSet and subjects list since I am reading them from the system only once to minimize the I/O ops. This can also be achieved using global variables, but I prefer this approach as I have few other use cases in mind.
- Detect faces in the input image. Have packed them in list
user_faceshere. - Next we iterate over each face, and compare it to all the Trained Models we have in our set. Match is done using
.predict()method of recognizer object. It places a rectangle along with name of subject if there is a match on the input image to create an output image. - We have set the threshold confidence as 30.0. I feel this is a misnomer because it’s not the confidence but the lack of it. That is, lower the confidence, higher the match! So, basically am calling the match a success if it is less than a threshold value of 30.0.
- I use a flag to indicate the match as return it to the calling function, in addition to the output image.
def FaceMatcher(user_image, TrainedSet, subjects):
    AKSHAT_AUTH = False
    cascadePath =  '/Users/Akshat/PythonAkshat/Apps/Image/Face Detection/Final/haarcascade_frontalface_alt.xml'
    faceCascade = cv2.CascadeClassifier(cascadePath)
    user_image = imutils.resize(user_image, width=1000)
    user_faces = faceCascade.detectMultiScale(user_image)
    i = 0
    for (x,y,w,h) in user_faces:
        base_confidence = 30.0
        subject_label = 0
        for subject in TrainedSet:
            label_predicted, confidence_level = TrainedSet[subject].predict(cv2.cvtColor(user_image,cv2.COLOR_BGR2GRAY)[y: y+h, x:x+w])
            if(confidence_level < base_confidence):
                subject_label = label_predicted
                if((subject_label == 1) & (AKSHAT_AUTH == False)):
                    AKSHAT_AUTH = True
        cv2.rectangle(user_image, (x, y), (x+w, y+h), (0, 255, 0), 2)
        cv2.putText(user_image, subjects[subject_label], (x,y), cv2.FONT_HERSHEY_PLAIN, 1.5, (0, 255, 0), 2)

    return(user_image, AKSHAT_AUTH)
Now we create a method that starts taking a live video feed using webcam (cv2.VideoCapture(0)) and passes each frame as an input image to our function FaceMatcher.
Here video_capture = cv2.VideoCapture(0)sets the source of video to webcam. This can point to a file as well. The way it works is:
- Initialize TrainedSet and subjects by called
ReadTrainedSet()function. We will reuse these values for every call ofFaceMatcherfor each frame. It reduces I/O. - We read video one frame at a time and pass it to
FaceMatcher. We read updated frame and authentication flag in response variables. Updated frame is output frame ofFaceMatcherand has faces marked with a rectangle and tagged with the subject name, in case there was a match. - If authentication succeeds or if user presses ‘q’, we quit the video and return the flag to calling function.
def FaceinVideoStream():
    cascPath = '/Users/Akshat/PythonAkshat/Apps/Image/Face Detection/Final/haarcascade_frontalface_alt.xml'
    faceCascade = cv2.CascadeClassifier(cascPath)
    video_capture = cv2.VideoCapture(0)
    TrainedSet, subjects = ReadTrainedSet()
    while True:
        ret_code, frame = video_capture.read()
        frame, AKSHAT_AUTH = FaceMatcher(frame, TrainedSet, subjects)
        cv2.imshow('Video', frame)
        if cv2.waitKey(1) & 0xFF == ord('q'):
            break
        if(AKSHAT_AUTH == True):
            break

    video_capture.release()
    cv2.destroyAllWindows()
    return(AKSHAT_AUTH)
Have created this small little function so that it can speak the text string passed to it. As I have mentioned earlier in this post, you can skip this step if you don’t need voice output.
def SpeakText(voiceinput):
    CYengine = pyttsx3.init()
    CYengine.say(voiceinput)
    CYengine.runAndWait()
So, now we build the main function which pretty much is just calling FaceinVideoStream()and speaking out the confirmation in case authenticated. For obvious reasons, this is CipherYogi()
def CipherYogi():
    SpeakText("Please look at camera for Authentication")
    AKSHAT_AUTH = FaceinVideoStream()
    time.sleep(5)
    if(AKSHAT_AUTH):
         SpeakText("Akshat Authenticated")
Woohoo!
CipherYogi()