I love music, and I am also lazy. So, amongst the many things I have always imagined asking the Genie for (once I get lucky with the lamp :)), this one has been a constant – playing good music as I lay cosily on the couch sipping my mojito. Well, till the time Genie shows up, let’s try and make do with our CipherYogi. He might not be residing in a lamp or sporting a cool goatee (or may be he does!), but he can surely do the job for us – minus the mojito though 🙁
So, now we make CipherYogi learn playing YouTube videos on Chromecast following a voice command.
import speech_recognition as sr
import pyttsx3
import pychromecast
from pychromecast.controllers.youtube import YouTubeController
from youtubesearchpython import SearchVideos
import json
We start by importing required dependencies. Will use speech_recognition for recognizing speech input. Since I plan to use Microphone, I have also installed PyAudio. You can use other sources also. Further, I shall be using Google recognizer recognize_google. You have other options too – e.g Bing, Sphinx etc. You can check out the library documentation here and make your choice. We will use pyttsx3 to give our Genie a voice :). We can simply pass a string and have it voiced out. You can configure a bunch of things e.g volume level, voice (male/female) etc. If interested, check out the documentation and examples here. Next I have imported pychromecast and YoutubeController for locating Chromecasts on my network (Wi-Fi), and to play/control YouTube video. json as you might have guessed, will help us parse search results to locate requisite details. All right then! let’s set sailing!
To begin with, let’s start building services that intend to reuse. In above code, I have made a super simple voice output service that takes a string as input and have called it SpeakText. Another approach could be to initialize the engine once and keep invoking it, but as I gather from a few articles, this isn’t the best way to do it. You would rather have engine reinitialized every time you need a voice output.
def PlayYoutube():
    attempts = 0
    r_yt = sr.Recognizer()
    while(1):
        try:
            with sr.Microphone() as source2:
                SpeakText("Which YouTube video do you want me to play")
                audio2 = r_yt.listen(source2)
                search_input = r_yt.recognize_google(audio2)
                search_input = search_input.lower()
                SpeakText("Great, Playing now" + search_input)
                break
        except:
            SpeakText("Sorry, I could not understand that")
            attempts = attempts + 1
            if(attempts == 3):
                SpeakText("I am sorry. Please start over")
                return

    my_device = "Family room TV"
    chromecasts = pychromecast.get_chromecasts()
    cast = next(cc for cc in list(chromecasts)[0] if cc.device.friendly_name == my_device)
    cast.wait()
    mc = cast.media_controller

    search = SearchVideos(search_input, offset = 1, mode = "json", max_results = 3)
    results = json.loads(search.result())
    video_id = results['search_result'][0]['id']

    yt = YouTubeController()
    cast.register_handler(yt)
    yt.play_video(video_id)
    mc.block_until_active()
    mc.play()
Brilliant! So, now we will build the core – PlayYouTube. Once invoked, it initializes a counter to track number of unsuccessful attempts. I have kept it as 3 here. It then initializes Recognizer object which in turn shall be processing Microphone input. Next we stream Microphone input (using sr.Microphone()) to the Recognizer object using listen() function in an infinite loop. We then prompt the user to voice out the video he/she wants to play using SpeakText(). Once the input audio has been captured, we use Google library to convert it to text (search_input) and exit the loop to start processing over the text, which is video user wants to play. Any exception to this process is captured as an unsuccessful attempt. Once we have the text string of the video user wants to play, we use get_chromecasts() to locate all the Chromecasts devices in the local network as a list object (it’s actually list of lists, with a list each for each Chromecast) and zero down on the one we want to cast. First element of each of these lists is the Chromecast object and we capture the same in the variable cast. We then call wait() to keep it ready, and assign a controller using .media_controller, to be used to control playing of video. We would need it after we have located the video on YouTube. So, next we start looking up for the video by passing search_input to SearchVideos function. We capture the response in variable = search, which is a class object. I haven’t ventured into understanding more on the attributes of this object, except for what is required for my objective here (told you, am lazy 🙂 ). So, result() function attribute is what I need as it gives me string output of the search results, and parse them using json.loads(). We then get a dictionary of search results with key = search_result and value = list of search results, each one in a dictionary format. These results have following parameters: dict_keys([‘index’, ‘id’, ‘link’, ‘title’, ‘channel’, ‘duration’, ‘views’, ‘thumbnails’, ‘channelId’]). In our case, we need 'id' for playing videos. Btw, in case you have YouTube content of your own, and want to track how it’s faring, youtubesearpython could be an excellent place to start. Okay! so the dish is now ready, we just need to plate it up. So, we create a YoutubeController object and pass it to the register_handler() function of cast object. This will allow us to cast whatever gets played on YouTube. And so, we simply play on YouTube using play_video and stream it on Chromecast using play() attribute of media_controller
def CipherYogi():
    SpeakText("Please look at camera for Authentication")
    AKSHAT_AUTH = FaceinVideoStream()
    time.sleep(5)
    if(AKSHAT_AUTH):
         SpeakText("Akshat Authenticated")
         ObjFinder()
    SpeakText("Hello Akshat what do you want me to do")
        r = sr.Recognizer()
        while(1):
            try:
                with sr.Microphone() as audio_source:
                    r.adjust_for_ambient_noise(audio_source, duration=0.2)
                    input_audio = r.listen(audio_source)
                    AudioText = r.recognize_google(input_audio)
                    AudioText = AudioText.lower()
                    print("Hi Akshat, Did you say " + AudioText)
                    SpeakText(AudioText)
                    if "youtube" in AudioText:
                        PlayYoutube()
            except sr.RequestError as e:
                print("Could not request results; {0}".format(e))
            except sr.UnknownValueError:
                print("unknown error occured")
If you have followed it till here, this one must be super easy. All I do here is to read Microphone input and check if the user (which is me 🙂 ) has said “YouTube” in it or not. If yes, it becomes a trigger for me to load PlayYouTube() function.
In the previous post, I trained CipherYogi to recognize my face and use the superpower to authenticate me before it performs any other magic for me. Now that CipherYogi has learnt it and shall master it over a period of next few months wherein I intend to figure out how it could progressively train itself further, I will now make it take baby steps towards identifying the objects I use – my watch, my mobile, my laptop etc etc. In this post, I will be covering how CipherYogi learns to identify these objects. I have used live webcam feed as the input, however it can very well be done on image or video as input (i.e you can make it detect if a given object is there or not in an image or a video).
Following are the steps we will follow:
Gathering samples – negative and positive.
Training cascade using sample images
Use cascade for object detection
Step 1:
First things first. In order to train cascade, we need a whole lot of sample images – both positive (one with the object) and negative (one without the object), say 1000+ each with ideally 2:1 ratio of positives to negatives. As you would have guessed, getting negative images sounds like an easier problem. In my example here, I will be training to identify my watch and it’s not easy for me to find thousands of images of my watch, right? Well, not really. We have some good news here. All we need is just one positive image (as a minimum), and use built-in function opencv_createsamples() which shall reuse the same image to generate a set of positive images. It does so by rotating the positive image at various angles and superimposing on negative images. So, what we really need therefore to get started is – a bunch of negative images and one positive image. While you can use your own images for the negative image set as long as you are sure none of them carry the object to be detected, there is a another way to create the set. And that is simple download from image-net.org (visit the website and create an account. You can use the images for non-commercial purposes). This part can be automated using a script like the one below. So, let’s start by importing the necessary libraries.
import urllib.request
import cv2
import numpy as np
import os
And now we are all set to fetch negative images. In the code below, I have fetched images from 4 different Image-net URLs into a folder neg. Have converted image to GRAYSCALE, and resized to a standard 100 * 100 before saving them with a counter (pic_cnt) as the filename. This approach allows me to fetch more images at a later date without worrying about existing ones getting overwritten. Please note that ids here is a list of WordNet IDs used to create URL for fetching image URLs. You can find more about them here
import urllib.request
import cv2
import numpy as np
import os

def fetch_images():
    ids = ['n00523513', 'n02119789', 'n02478875', 'n02473983']
    for id in ids:
        print(id)
        neg_images_link = 'http://image-net.org/api/text/imagenet.synset.geturls?wnid='  + id
        neg_image_urls = urllib.request.urlopen(neg_images_link).read().decode()

        if not os.path.exists('neg'):
            os.makedirs('neg')

        pic_cnt = len(os.listdir('neg')) + 1
        for i in neg_image_urls.split('\n'):
            try:
                f = open("neg/"+str(pic_cnt)+".jpg", 'wb')
                f.write(urllib.request.urlopen(i, timeout=5).read())
                f.close()
                img = cv2.imread("neg/"+str(pic_cnt)+".jpg",cv2.IMREAD_GRAYSCALE)
                resized_image = cv2.resize(img, (100, 100))
                cv2.imwrite("neg/"+str(pic_cnt)+".jpg",resized_image)
                pic_cnt += 1
            except Exception as e:
                print(str(e))
fetch_images()
Now that we have negative images we need to ready our positive image for superimposition. So, we will resize the image to something like 50 * 50 (since our negatives are 100 * 100). For step 2 of the process, we need to move the negative image set neg (around 2000 images) into OpenCV workspace of a server along with the positive image. This is because this step is computationally intensive and thus we are better off executing it on a more powerful machine. You can get from AWS, Azure or other service providers. However, I have used Google Colab notebook here which provides a machine powerful enough. (Dear Google – sending love!).
So, I now copy my neg folder to the Google drive (apparently, there are ways to automate upload from local drive to Google drive, but I have used the old-is-gold approach of copy-paste :). If, however, you are looking at automating it, which I feel you should, here’s one explainer you might find useful). My object image is watch01.png, and I have copied it to my colab drive as well. We then simply mount the drive using drive.mount() command and then navigate to our working directory. We then simply read the image, resize it to 50*50 and save it. I have used _5050 as suffix to the original image name, you may choose whatever you prefer.
Now that we have the ingredients in place, let’s start cooking! Oh… wait…let’s just do some quick stuff to ensure sanity of our workspace. For this, I have written a few lines of code to delete all files other than neg and watch01_5050.jpg before execution. Of course, you don’t need this if you are running it for the first time or delete files manually (I found it painfully slow though and hence wrote the code to do it instead). We then make 2 directories:
info: To save all positive samples and a file info.lst which captures information regarding placement of object image over each negative image.
data: To capture cascade.xml which will be used for detecting object.
import shutil
import os
path = './'
all_files = []
all_files = [file for file in os.listdir(path)]
print(all_files)
for file in all_files:
  if(os.path.isdir(file)):
    if(file in ['neg', 'watch01_5050.jpg']):
      continue
    else:
      shutil.rmtree(file)
  else:
    os.remove(file)

os.mkdir('info')
os.mkdir('data')

images = [img for img in os.listdir('neg')]
for img in images:
          img_path = 'neg' + '/' + img + '\n'
          with open('bg.txt','a') as f:
               f.write(img_path)

!opencv_createsamples -img watch01_5050.jpg -bg bg.txt -info info/info.lst -pngoutput info -maxxangle 0.5 -maxyangle 0.5 -maxzangle 0.5 -num 1950

!opencv_createsamples -info info/info.lst -num 1950 -w 20 -h 20 -vec positives.vec

!opencv_traincascade -data data -vec positives.vec -bg bg.txt -numPos 1800 -numNeg 900 -numStages 10 -w 20 -h 20
And now, it’s time for action! We now create a background file bg.txt which would tell openCV where to find negative images for creative positive samples. To do so, we simply iterate over contents of neg and append path of each file in bg.txt. We now thus have 3 files in our working directory right now – neg, watch01_5050.jpg, and bg.txt.
-img watch01_5050.jpg: It’s telling openCV where to find positive sample
-bg bg.txt: where to find negative samples
-info info/info.lst: information on positive samples is compiled in a info.lst file. A sample entry in the file looks like "0001_0059_0020_0027_0027.jpg 1 59 20 27 27" which comprises of name of positive sample followed by number of objects in the image (1 in our case) and then the object rectangle – (x, y, width, height)
-pngoutput info: destination of positive samples. info directory in our case
-maxxangle 0.5 -maxyangle 0.5 -maxzangle 0.5: this is an optional parameter and specifies maximum rotation angle before superimposition
In this line, we create. vector file which is basically just a stitched version of all the positive samples. Here we have used 20*20 as the dimension of the images in vector file. One could use higher than this, but it would take longer to run the trainer.
So, finally we train the cascade. This code works like below:
-data data: specifies the directory where cascade will be saved. It is data in our case.
-vec positives.vec: vector file to be picked for training
-bg bg.txt: background file for locating images that we used for superimposition (negative images in our case)
-numPos 1800 -numNeg 900: number of positive and negative images to be used for training
-numStages 10: number of stages of training. Depending upon the number of samples, your trainer might not run through all stages. You can find stage-wise files in the data folder and the cascade file as an output of the last executed stage.
-w 20 -h 20: width and height
So, my code ran for 8 stages and generated cascade.xml file which I will now use for detecting object i.e my watch.
Step 3: Detecting object
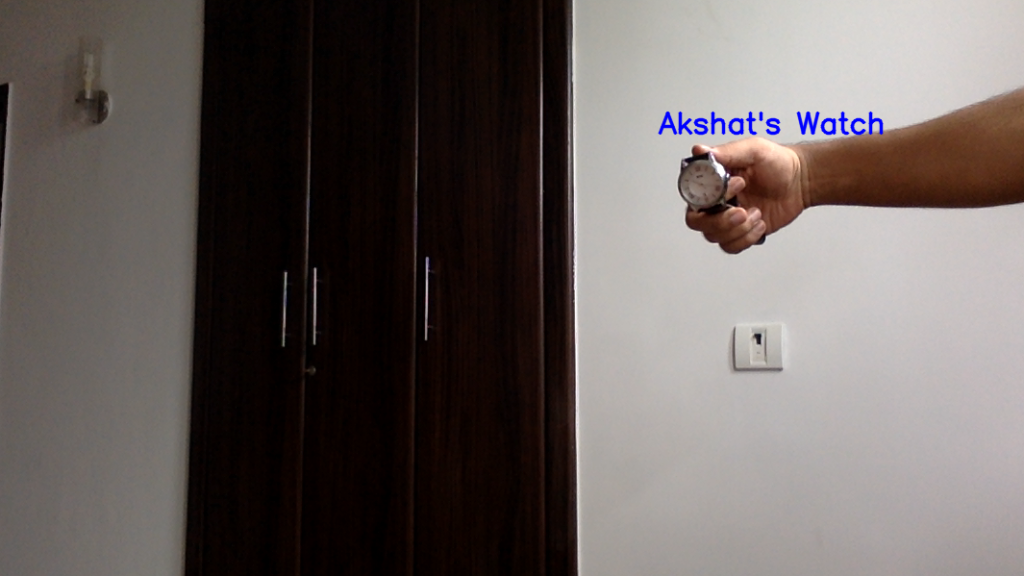
Finally, we use the cascade to detect objects. The file cascade.xml generated in step 2 and saved in data directory is copied to local drive in a folder named cascades in the local working directory. I have renamed the cascade as watch_01_stage8.xml. Next, I create a list user_cascades wherein I add the cascades (of course, for now we have just one). Then I have created one more list user_objects to store names of objects we are trying to detect. I have done so because I intend to add more objects in future and this code makes it forward compatible thereby. Once done, we take video feed using cv2.videocapture(0) and use the cascades to detect objects in the input frames. If found, we print the object name with “Akshat’s” as the prefix (e.g “Akshat’s watch”). As I add more object cascades, I need to simply copy the cascades files in the cascades directory and rename the file in such a way that it has object descriptor in the beginning followed by an underscore.
def ObjFinder():
    user_cascades = [cv2.CascadeClassifier('./cascades/' + cascade) for cascade in os.listdir('./cascades')]
    user_objects = [filename.split('_')[0] for filename in os.listdir('./cascades')]
    cap = cv2.VideoCapture(0)
    while 1:
        ret, img = cap.read()
        gray = cv2.cvtColor(img, cv2.COLOR_BGR2GRAY)
        for i in range(len(user_cascades)):
            user_objs = user_cascades[i].detectMultiScale(gray)
            for (x,y,w,h) in user_objs:
                font = cv2.FONT_HERSHEY_SIMPLEX
                cv2.putText(img,'Akshat\'s ' + user_objects[i],(x-w,y-h), font, 1, (255,0,0), 2, cv2.LINE_AA)
        cv2.imshow('img',img)
        k = cv2.waitKey(30) & 0xff
        if k == 27:
            break

    cap.release()
    cv2.destroyAllWindows()
We then add it to the core CipherYogi function and let the magic begin!
def CipherYogi():
    SpeakText("Please look at camera for Authentication")
    AKSHAT_AUTH = FaceinVideoStream()
    time.sleep(5)
    if(AKSHAT_AUTH):
         SpeakText("Akshat Authenticated")
         ObjFinder()
As a teenager, every time I would watch a Sci-Fi movie, one of the things that would really intrigue me was the way characters would gain access to the Secret Labs. It would be a sophisticated looking device at the entrance which would scan the face and in speak in its machine tone “Authenticated”. I wished having something as cool as that instead of a humble door bell 🙂
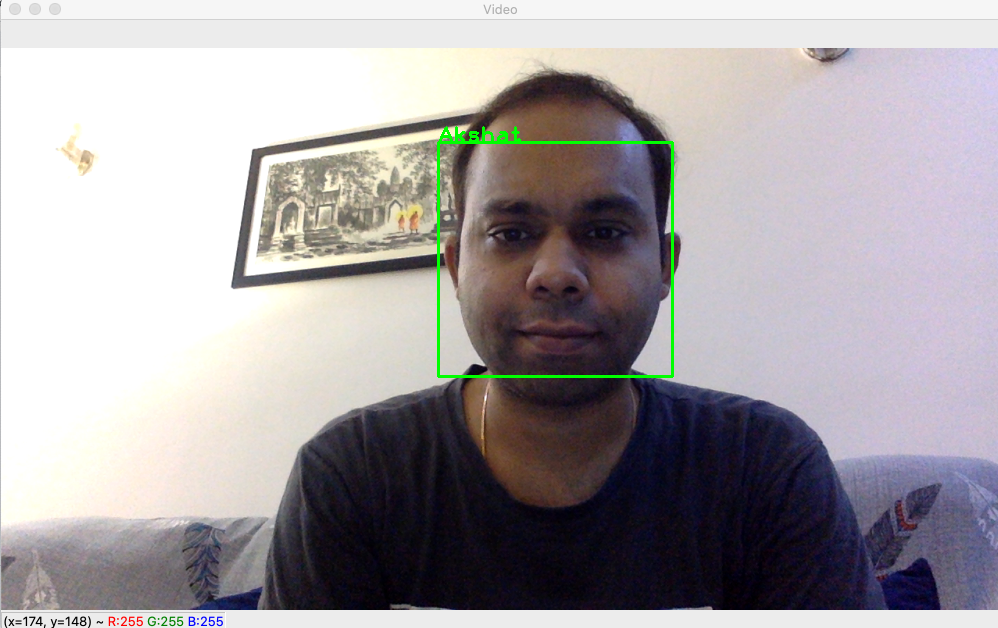
Well! The code below does that. In this, I will build a simple Face Recognition system that can take a live video feed or a static image as an input and mark the faces with their respective identifiers (I have used name e.g Akshat).
Face Recognition in a live video feed.
These are the steps we will follow to build this:
Gathering a few solo images of the users. I have taken just about 50, but that’s only because I am lazy. You should pick at least 100 images. Don’t worry about cropping out just the face, the script here does that for you.
We will use these images for training our models, one for each user. We will then save these models into files thus making them available for usage by any code.
Will write a script that uses my laptop camera to take a live video feed and uses the models to determine if the user in front of the laptop is a known one or not.
Step 1: Gathering Images
So, after diving into my wife’s treasure cove of our vacation pics, I pulled out a few for solo ones (wasn’t easy to find Akshat-only pics 😐 but did manage to get a few for myself and a lot many for her). So, we move to the next step. I have created a folder on my local drive for storing these training images. I have named the folder “Faces” which isn’t the best name. You should rather have something more appropriate and serves as a mnemonic.
Within this folder, I have created sub-folders one for each user – 2 in my case. I have given them a format <subject_id>_<subject_name>. So, I got now 2 folders under “Faces” and these are “01_Akshat” and “02_Ankita”. Reason I do so is because down the line, I plan to automate the build-up of training set so that it keeps pace with my ageing self (sigh!).
I have then copied the images into respective folders and have used a format <subject_id>_<subject_name>_<image_id>. So, in “01_Akshat” folder, I have now – 01_Akshat_01.jpg, 01_Akshat_02.jpg up to 01_Akshat_50.jpg.
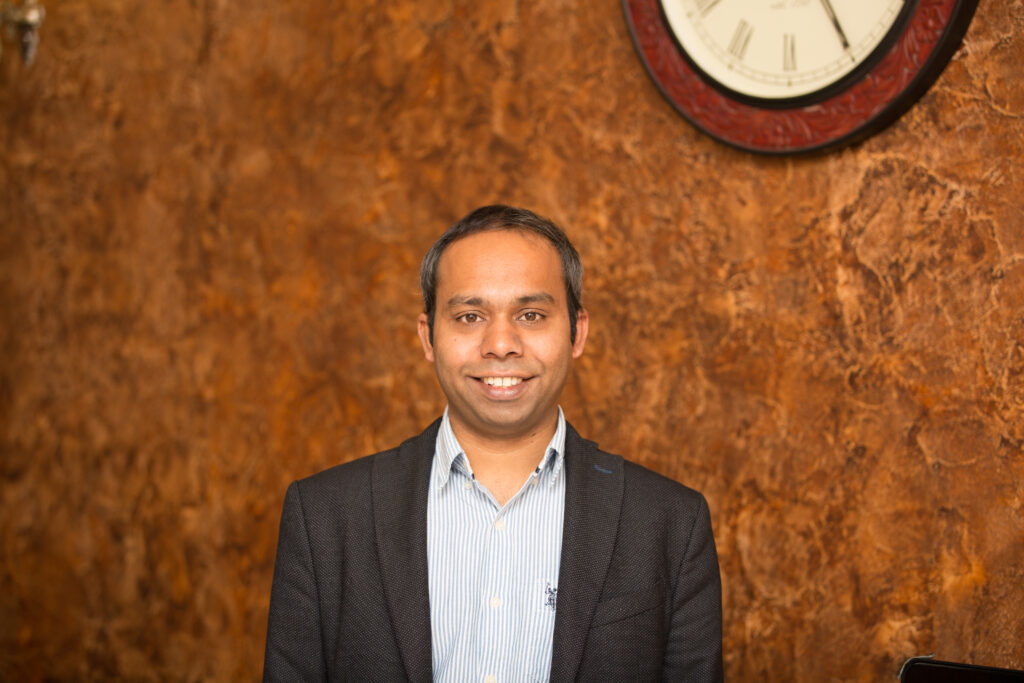
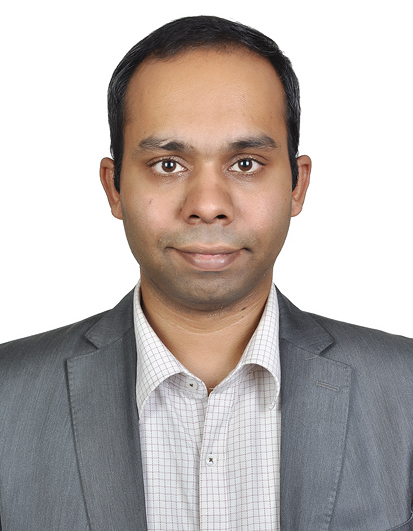
01_Akshat_01.jpg
01_Akshat_02.jpg
01_Akshat_03.jpg
Images used for training the model
As you might have noticed, images are of different resolutions but that’s not a problem either. I then prepare a set of images in other folder (02_Ankita) as well.
Step 2: Training Models
So, now we write a Python script which starts by importing the required libraries.
import cv2
import numpy as np
import os
import imutils
I use a MacBook which comes pre-loaded with Python 2. I have upgraded it to Python3. I am assuming that you have Python3 installed as well, and if not, you can look at one of the many web tutorials to understand the process. Once done, install the required libraries. I have used pip to get the required libraries. For most of the libraries, it’s just a 1 line command – pip3 install <library_name> except for openCV (cv2). I am skipping the installation part as well, however should you have any questions, you may put me a quick line and I would be happy to help. For installing openCV, I found this tutorial very helpful (this is for Mac).
We now create a function which takes folder path as input and returns following:
Faces for training after they have been cropped out from the images. (One face per image, since the image were solo images)
Label – this is essentially an identifier which tells the model that the image corresponds to the same user. For example, all the images of “subject = Akshat” at the time of training must take the same label. In my case, I have separated the label from the directory name and have used the same for training. That is, folder name “01_Akshat” tells my system that label = 1 belongs to “Akshat” and thus all the images in this folder must be tagged to the label = 1.
Subject name along with subject id. This is same as Directory name itself except for the leading “0”. e.g 1_Akshat.
def get_TrainingImages_and_Labels(training_datadir):
    image_paths = [os.path.join(training_datadir,imgfile) for imgfile in os.listdir(training_datadir)]
    training_faces = []
    labels = []
    sub_id = int(os.path.split(training_datadir)[1].split("_")[0])
    sub_name = os.path.split(training_datadir)[1].split("_")[1]

    for image_path in image_paths:
        print(image_path)
        sub_image = cv2.imread(image_path,0)    #added 0 to read as Grayscale
        faces = faceCascade.detectMultiScale(sub_image)
        for (x,y,w,h) in faces:
            training_faces.append(sub_image[y:y+h, x:x+w])
            labels.append(sub_id)
    return(training_faces,labels, str(sub_id) + "_" + sub_name)

cascadePath='/Users/Akshat/PythonAkshat/Apps/Image/Face Detection/Final/haarcascade_frontalface_alt.xml'
faceCascade = cv2.CascadeClassifier(cascadePath)
In above code, we have passed folder path as input and iterated over the images in the folder and created a list of paths of all image files. We then create lists to store faces for training and corresponding labels, which would be extracted from each image file. Next we iterate over all the images to append faces and labels respectively. These lists are then returned for training. We also return subject_id + subject_name e.g “1_Akshat” as third parameter. You might be having a question – “what is happening in this line.
faces = faceCascade.detectMultiScale(sub_image)
Let me explain. But before that, look at these two lines of code first:
OpenCV provides a set of Haar cascades and in this case, we have used haarcascade_frontalface_alt.xml for face detection. cv2.CascadeClassifier(cascadePath) is the method that loads the Haar cascade by taking its path as input.
What is Haar cascade? It is a machine learning approach where a classifier is created using a number of positive and negative images. A set of features (a property of a pattern that helps classify/measure) is created which together help identify a face. While potentially there could be a very high number of features that would classify an image as a face, a cascade function is used to optimize the computation by quickly eliminating the segment under investigation if it doesn’t meet the stage-wise criteria. For those who want to dig deeper, I have enclosed a few good links here: 1, 2. You could also write to me, and I will try my best to help.
Once we have loaded the Haar cascade, we use the object to locate faces in the given image. We do so here:
faces = faceCascade.detectMultiScale(sub_image)
If you couldn’t understand the above part, it’s just fine. Use the Haar cascades for your scripts, as you gather better understanding of them in parallel.
So, we now move to creating a Trained Set. Here’s the code:
Here, we are building our Trained Models by passing path of folders that carry Training Images. So, we iterate over contents of “Faces” folder which in my case have two sub-folders. I have used the flag os.path.isdir() to ensure that it picks only directories. In each iteration, it returns 2 lists – one each for faces and labels and subject identifier (e.g “1_Akshat”).
Next we create a Face Recognizer object. In this script, I have used LBPH though openCV provides 2 other recognizers. These are Eigen Face Recognizer (createEigenFaceRecognizer()) and Fisher Face Recognizer (createFisherFaceRecognizer()). If you want to learn more about LBPH, I recommend you look at this tutorial. Once we have created Recognizer object, we use .train() method to create a Trained model. To do so, we pass the lists we have fetched by calling the get_TrainingImages_and_Labels() function we had created. As the last step, we have saved the trained models in a Folder “TrainedSet” and give each model a name that allows other scripts to extract subject’s id and name. Models are saved in “.yml” format using .write() method of recognizer object.
Step 3: Recognizing Faces in live camera Feed
Before we start taking live camera feed, we will create a function that accepts an image, extracts faces from it and then matches each face with known users, using Trained Models we just created. It also returns a Flag (AKSHAT_AUTH) in case it is able to detect that one of the users in the input image is yours truly :). If so, it sets the Flag to True thus informing us that user Akshat has been successfully authenticated. We have now created a separate script. I have named it CY02.py (of course CY = CipherYogi 🙂 )
To begin with, we import the required libraries. I have imported pyttsx3 so that I can do a Text to Speech conversion and thus generate voice based confirmation of certain events, e.g successful authentication. You can of course, leave it out if you are are good without it.
import cv2
import os
import imutils
import numpy as np
import pyttsx3
import time
We create a Dictionary object TrainedSet with keys = subject_id_subject_name and value = Trained model. To do this, we iterate over the filed in the Folder “Trained Set” and look for files with “.yml” extension. We have also created a list “subjects” which has been initialized with null values preceded by “Unknown” (i.e 1st element or [0] index value). To read the Trained Model objects, we use .read() method of Face recognizer (earlier we had used .write() to create files).
def ReadTrainedSet():
    cascadePath =  '/Users/Akshat/PythonAkshat/Apps/Image/Face Detection/Final/haarcascade_frontalface_alt.xml'
    faceCascade = cv2.CascadeClassifier(cascadePath)
    print("Now reading trained set")
    TrainedSet = {}
    TrainedSetPath = '/Users/Akshat/PythonAkshat/Apps/Image/Face Detection/Final/TrainedSet'

    subjects = ["Unknown"] #subject[0] to refer to Unknown

    for traineddatafile in os.listdir(TrainedSetPath):
        subjects.append("")

    for traineddatafile in os.listdir(TrainedSetPath):
        if ".yml" in traineddatafile:
            name = os.path.split(traineddatafile)[1].split(".")[0]
            subjects[int(name.split("_")[0])] = name.split("_")[1] #e.g extracting name "Ankita" from "2_Ankita"
            path = TrainedSetPath + '/' + traineddatafile
            TrainedSet[name] = cv2.face.LBPHFaceRecognizer_create()
            TrainedSet[name].read(path)
    return(TrainedSet, subjects)
Having read the trained models and indexed them with their corresponding subject_id_subject_name as key in a Dictionary object, we now start the Face prediction part. To do so, we first extract the faces in the input image and then iterate over them, comparing with each Trained model in each iteration. Since the input images could be of any resolution, I have scaled them to a standard size using imutils.resize()function. Overall, the function works as follows:
Take image as input, along with TrainedSet and subjects list. I have passed TrainedSet and subjects list since I am reading them from the system only once to minimize the I/O ops. This can also be achieved using global variables, but I prefer this approach as I have few other use cases in mind.
Detect faces in the input image. Have packed them in list user_faces here.
Next we iterate over each face, and compare it to all the Trained Models we have in our set. Match is done using .predict() method of recognizer object. It places a rectangle along with name of subject if there is a match on the input image to create an output image.
We have set the threshold confidence as 30.0. I feel this is a misnomer because it’s not the confidence but the lack of it. That is, lower the confidence, higher the match! So, basically am calling the match a success if it is less than a threshold value of 30.0.
I use a flag to indicate the match as return it to the calling function, in addition to the output image.
Now we create a method that starts taking a live video feed using webcam (cv2.VideoCapture(0)) and passes each frame as an input image to our function FaceMatcher.
Here video_capture = cv2.VideoCapture(0)sets the source of video to webcam. This can point to a file as well. The way it works is:
Initialize TrainedSet and subjects by called ReadTrainedSet() function. We will reuse these values for every call of FaceMatcher for each frame. It reduces I/O.
We read video one frame at a time and pass it to FaceMatcher. We read updated frame and authentication flag in response variables. Updated frame is output frame of FaceMatcher and has faces marked with a rectangle and tagged with the subject name, in case there was a match.
If authentication succeeds or if user presses ‘q’, we quit the video and return the flag to calling function.
Have created this small little function so that it can speak the text string passed to it. As I have mentioned earlier in this post, you can skip this step if you don’t need voice output.
So, now we build the main function which pretty much is just calling FaceinVideoStream()and speaking out the confirmation in case authenticated. For obvious reasons, this is CipherYogi()
def CipherYogi():
    SpeakText("Please look at camera for Authentication")
    AKSHAT_AUTH = FaceinVideoStream()
    time.sleep(5)
    if(AKSHAT_AUTH):
         SpeakText("Akshat Authenticated")